DIY Geometric Mirror Photo Backdrop
Summer is definitely here (with the 4th of July right around the corner), and that means it's time to get together with friends, eat good food, and enjoy the weather. And of course, capturing all those moments is an essential part. Use the following DIY tutorial to make a super-easy yet festive backdrop for all those upcoming summer soirées!
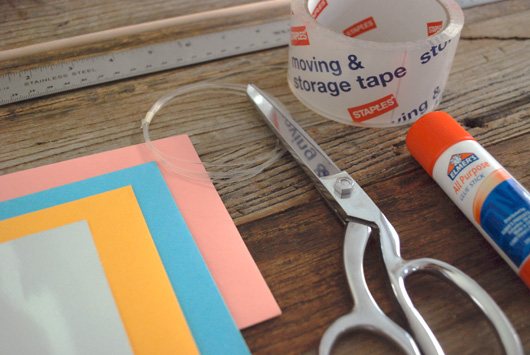
Materials
Scissors
Glue Stick
Paper of choice - We bought specialty mirror paper because we're loving silver right and the reflections it makes, but any sort of colored paper from your local craft store would work great too. For the 4th, blues or reds would be the obvious choice!
.25 inch wooden dowel (Home Depot or any home improvement store)
Fishing wire (Home Depot or any home improvement store)
Heavy-duty tape
Nails & hammer (optional)
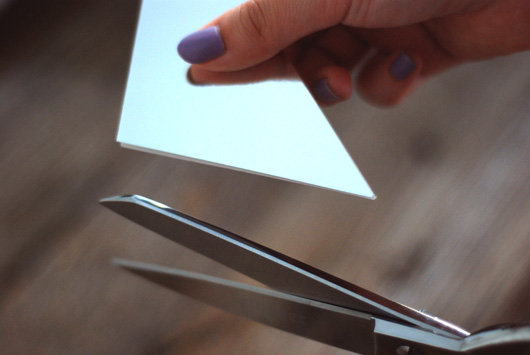
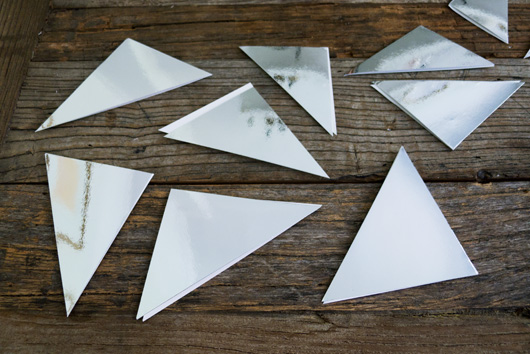
Step 1 Take two sheets of your paper and put them back-to-back with the decorative sides facing out. This is to ensure you get matched pairs of triangles. We used a paper cutter to cut our triangles but scissors work just fine! If your paper is large, it may be helpful to cut it down to more manageable rectangles. While holding the two sheets firmly in your hands, start cutting triangles out, rotating the paper as you go. We wanted triangles of various sizes and angles so we weren't very strict about how we cut.
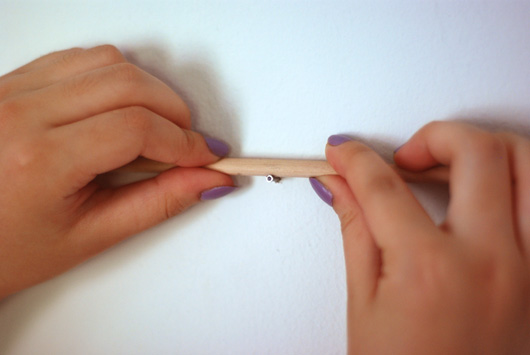
Step 2 Next, choose a wall that you'd like your backdrop to be on. You can hang the dowel on two nails on either end but, for a less permanent fixture, tape your wooden dowel to the wall at about the height you'd like to to be. It should be high enough so that you can take photos comfortably without the dowel showing right above someone's head.
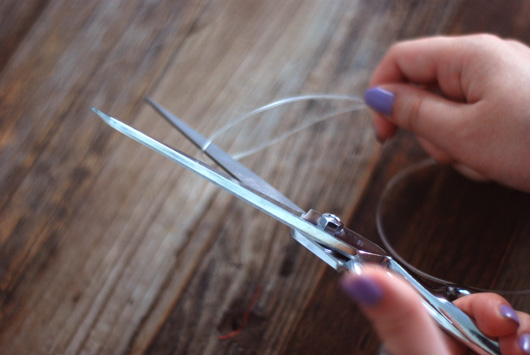
Step 3 Then, take the fishing wire and cut one piece to the length you desire - we chose to have it hang almost to the ground - with some extra room for tying the knots. Take that one piece and use it as a guide to cut the rest to near identical lengths. We had twelve but you can cut as many as you want, depending on the kind of look you desire.
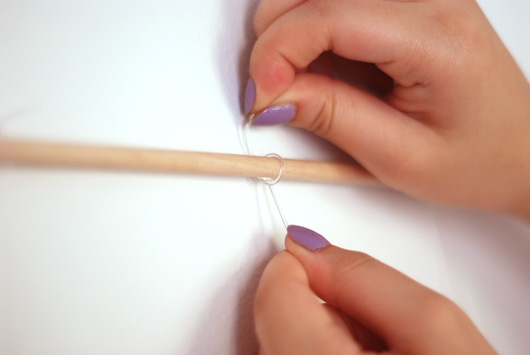
Step 4 One at a time, tie a length of fishing wire to the dowel. It may be a little slippery; double-knotting will help. When you've attached all your wires, space them out evenly across the dowel. The wires will curl and tangle wildly so pull each one straight down and tape the bottom of the wire to the wall. With a little bit of time, the wires will straighten themselves out!
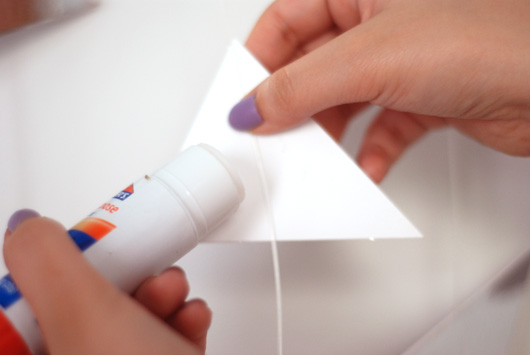
Step 5 Now, take a pair of triangles and place them so that the wire is sandwiched in-between. Dab glue on the backsides of the two pieces and press together so that they are aligned perfectly. Repeat for the rest of your triangles and distribute them however you'd like throughout the wires.
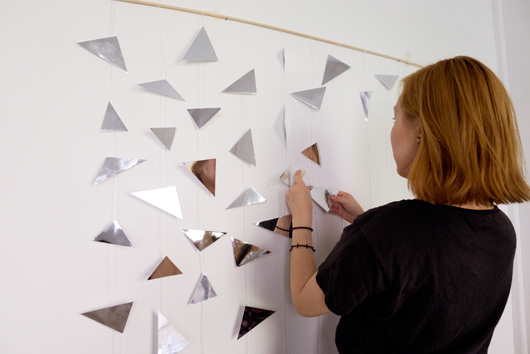
Step 6 Celebrate the fine work you put into making your new geometric mirror backdrop by taking lots of photos in front of it!